Tutorial: Sewing pleather appliques onto multiple layers for cosplay
- themakermage
- Mar 25, 2024
- 2 min read
If you, like me, have been obsessed with Baldur's Gate 3 to the point of wanting to cosplay all of the characters, this tutorial may come in handy. I have never had to topstitch so many pleather appliques before this video game. I struggled, I learned, and I perfected a process (good for home sewists, anyway). Here are my tips and tricks! And a few process photos.

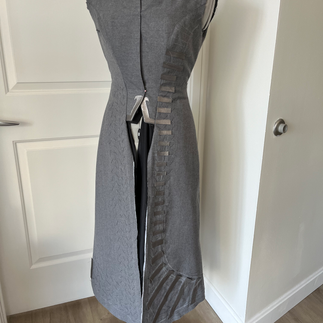
Here's the character I'm making currently: Isobel, a half-elf Selunite cleric.
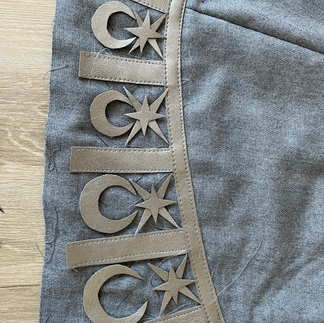
Because I'm still figuring out how to create image-heavy posts, I'm going to keep this one very focused on how to create the pleather appliques you can see used as trim on the front edges and bottom hem of her coat.
This particular part of the process also gave me a TON of trouble, so I hope it'll be a useful contribution to the Internet. TL;DR I was unable to make this type of embellishment work without the specific tools listed right below. With a normal sewing machine foot, the pleather (even though it only has mechanical stretch) stretches out and the wool/cotton underlayer bunches up. They don't stay flat; they gather and stretch and look absolutely awful. Once I started using these tools, the operation became incredibly easy, even boring. It wasn't very technical at all!
Materials:
walking foot for your sewing machine (I tried. A Teflon foot didn't work)
Well, I guess that's it.
Keep in mind that this experience/tutorial solves for a possible unique problem: appliquéing pleather over multiple layers. I'm actually working over two layers of fabric: the fashion layer of wool coating, and the flatlining layer of cotton organdy. Due to the weight and the bell-like, structured, floaty silhouette, I decided to flatline my coat skirt. That said, appliqueing pleather over TWO LAYERS of fabric was the worst and I am not sure how necessary the flatlining was, in the end.
Process pictured in the gallery below:
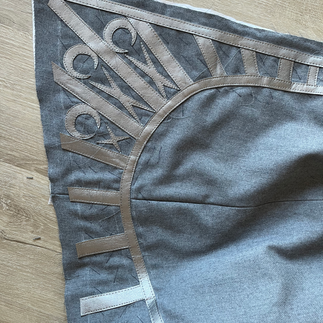
Start with your flatlined fabric: sewn into the seams, and also hand basted together.
Install walking foot on sewing machine.
Grab your basting adhesive and use it to tack down a few straight pieces at a time. More than this, and they start falling off as you manage everything through the machine.
Topstitch each piece!


Next steps:
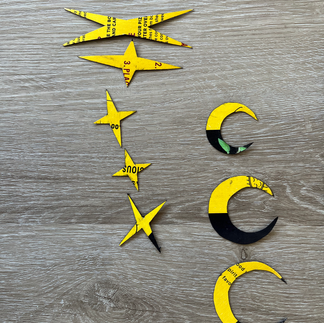
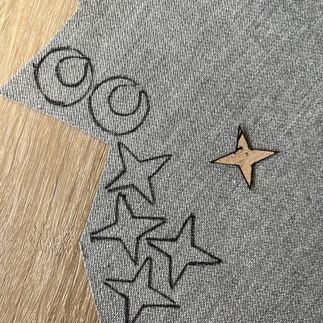
5. Using paper, draw out individual stars and moons to fit each segment.
6. Transfer to cardboard for easier tracing onto the pleather.
7. I was able to get away with mixing and matching a few variations of these shapes -- didn't have to create new ones for EVERY single segment.
8. Spray, stick, stitch, repeat.


It sounds so simple in this tutorial post! That said, my big revelation was that, as much as I'm a person who doesn't mind using advanced techniques with only very simple tools/just the tools I have available, I was NOT able to make this work without the basting adhesive and the walking foot. I tried. It didn't work. These tools not only made the job easy (though very boring), they made it POSSIBLE.
Final photo showing how it's coming along:

I am really proud of how smooth and regular all the embellishment is!
Thanks for reading! Let me know if there are other techniques you'd like to learn about.


Comments